WireGuard® is an extremely simple yet fast and modern VPN that utilizes state-of-the-art cryptography. It aims to be faster, simpler, leaner, and more useful than IPsec, while avoiding the massive headache. It intends to be considerably more performant than OpenVPN.
Additionally, Linus Torvalds, the creator of Linux, said that it is a work of art. And it is now included in the linux kernel.
In this article I will show how it can be used to establish site-to-site connection, when several separate networks are connected together. I will not be using docker for setting WireGuard up because it is much more complicated and moreover, it is not officially supported by docker image creators as mentioned here.
Prerequisites
- Hosts that have wireguard installed needs to have IP forwarding enabled. In order to do this update
/etc/sysctl.conffile and set the following:
net.ipv4.ip_forward=1

# If IPv6 is used also add
net.ipv6.conf.all.forwarding=1
After this apply the changes:
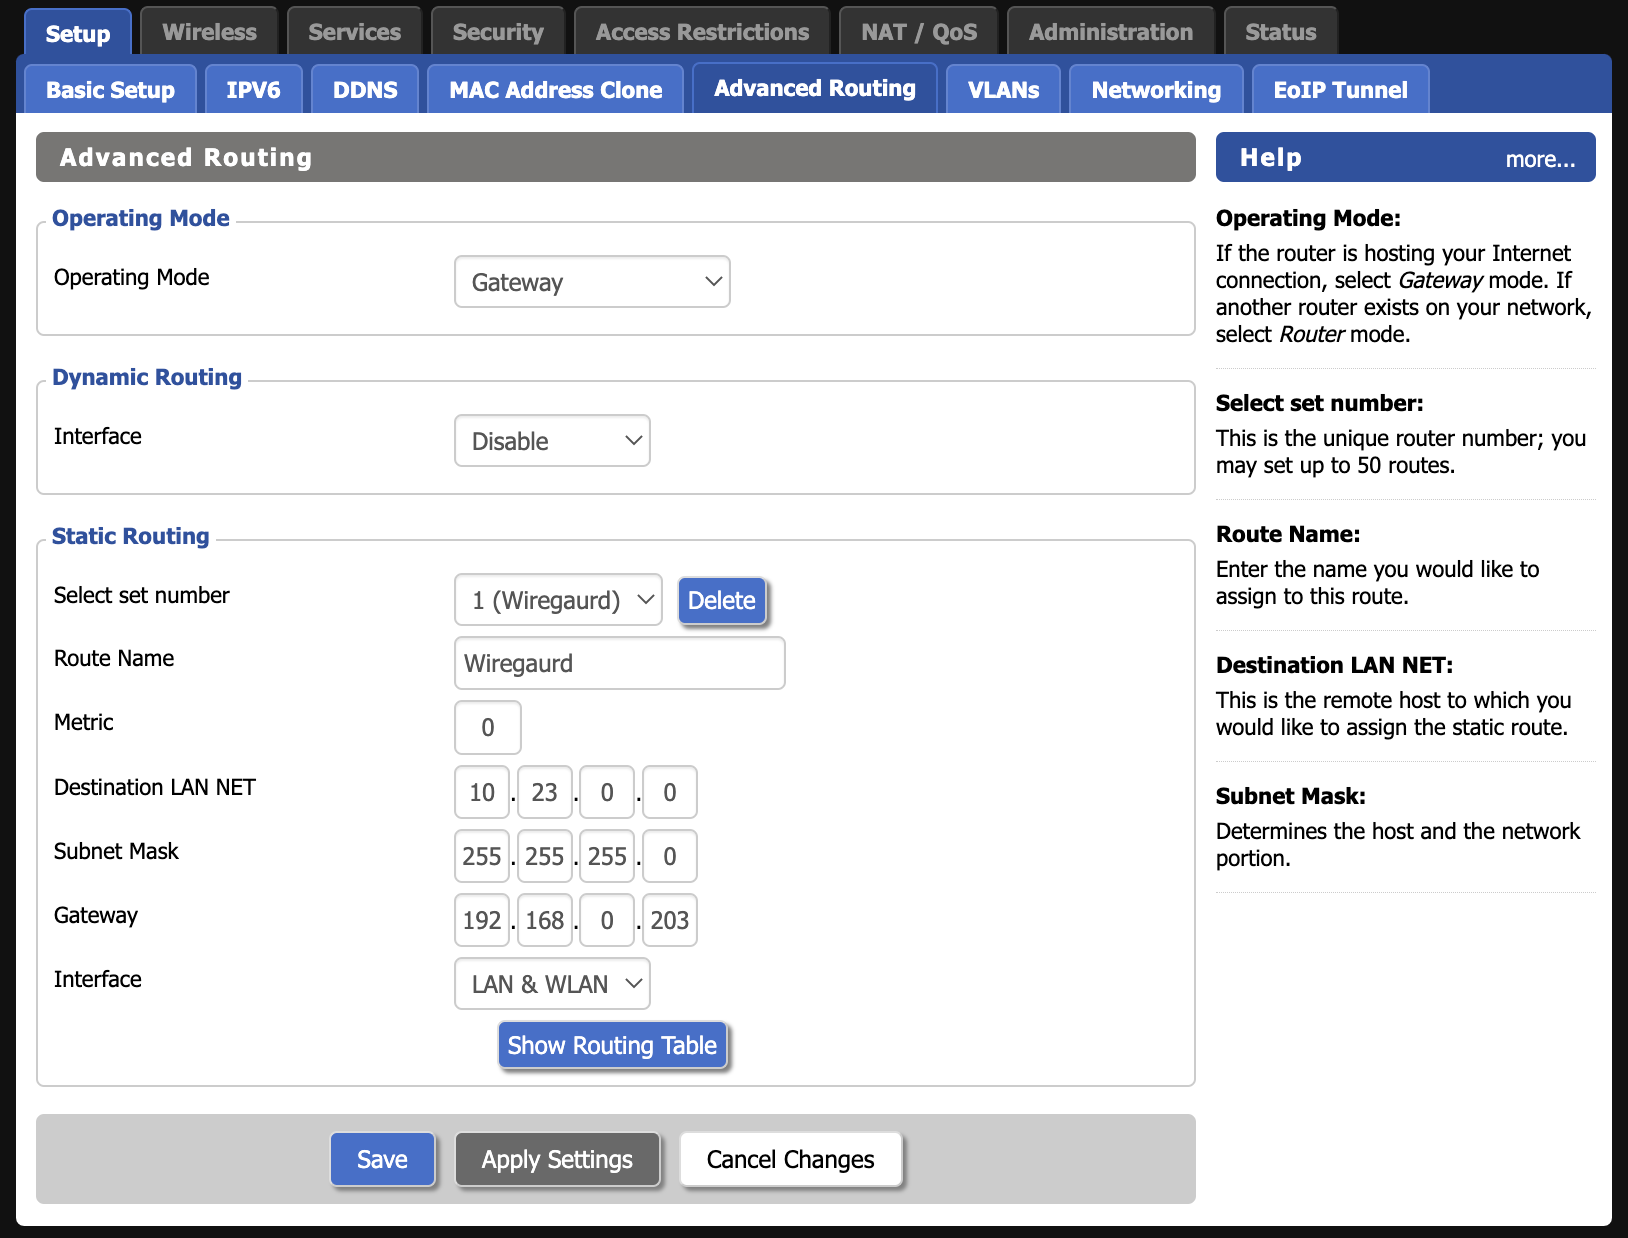
sysctl -p- If WireGuard is running on a host other than local network default gateway, then static route needs to be added on the default gateway. This way when a gateway receives WireGuard packets, it can forward them to the proper host. In case of DD-WRT routers this can be set up under Setup -> Advanced Routing. Make sure to setup routing rules for all destinations. In my case for the router that manages
192.168.0.0/24, I have to rules: one for10.23.0.0/24and another for192.168.1.0/24

Installation
WireGuard needs to be installed on all the hosts that will be connected together. At least one of them needs be publicly accessible over the internet. WireGuard can be installed using the following command:
sudo apt install wireguardServer Configuration
Generate public and private keys that will be used to secure communication:
wg genkey | tee privatekey | wg pubkey > publickeyThen edit WireGuard configuration file located at /etc/wireguard/wg0.conf and add the following:
[Interface]
Address = 10.23.0.1/24
ListenPort = 51820
PrivateKey = {server_private_key}

PostUp = iptables -A FORWARD -i wg0 -j ACCEPT; iptables -t nat -A POSTROUTING -o eth0 -j MASQUERADE;
PostDown = iptables -D FORWARD -i wg0 -j ACCEPT; iptables -t nat -D POSTROUTING -o eth0 -j MASQUERADE;

[Peer]
PublicKey = {peer1_public_key}
AllowedIPs = 10.23.0.2/32, 192.168.0.0/24

[Peer]
PublicKey = {peer2_public_key}
AllowedIPs = 10.23.0.3/32, 192.168.1.0/24
Do not forget to open 51820 port for incoming connections.
In the setup above I specify that server internal IP address is 10.23.0.1. The server will be listening for incoming connections on 51820. Additionally I specify PostUp and PostDown rules. This rules allow the host to route wireguard traffic to a proper interface. Do not forget to update eth0 interface if your interface is different.
In the config file I also specify peers with their respective IP address ranges.
Client Configuration
Generate public and private keys that will be used to secure communication:
wg genkey | tee privatekey | wg pubkey > publickeyClient configuration is very similar to the server one:
[Interface]
Address = 10.23.0.2/24
PrivateKey = {peer1_private_key}
ListenPort = 51820
DNS = 8.8.8.8

PostUp = iptables -A FORWARD -i %i -j ACCEPT; iptables -t nat -A POSTROUTING -o wlp1s0 -j MASQUERADE
PostDown = iptables -D FORWARD -i %i -j ACCEPT; iptables -t nat -D POSTROUTING -o wlp1s0 -j MASQUERADE

[Peer]
PublicKey = {server_public_key}
Endpoint = {server_public_ip_or_hostname}:51820
AllowedIPs = 10.23.0.0/24, 192.168.1.0/24
PersistentKeepalive = 25
Some notes on the client config:
- I specify PostUp and PostDown rules to allow traffic routing on the host machine. As can be seen in the example,
wlp1s0is the interface I use on the client. - In the peer section I specify the server publicly accessible address and port
- Peer section also includes
AllowedIPsfor the server and peer2, because traffic from peer1 to peer2 goest though the server - I also specify
PersistentKeepaliveto keep connection alive
Starting WireGuard
Once the server and peers configs are created, they can be started using:
wg-quick up wg0and connection status can be checked using wg or wg show.
If you want to stop the connection, then run:
wg-quick down wg0WireGuard can be started at system boot if service is enabled:
sudo systemctl enable --now wg-quick@wg0